One high-leverage idea to scale your audience (and your business). Delivered every Tuesday.
Get more views on your Instagram reels with ads
|
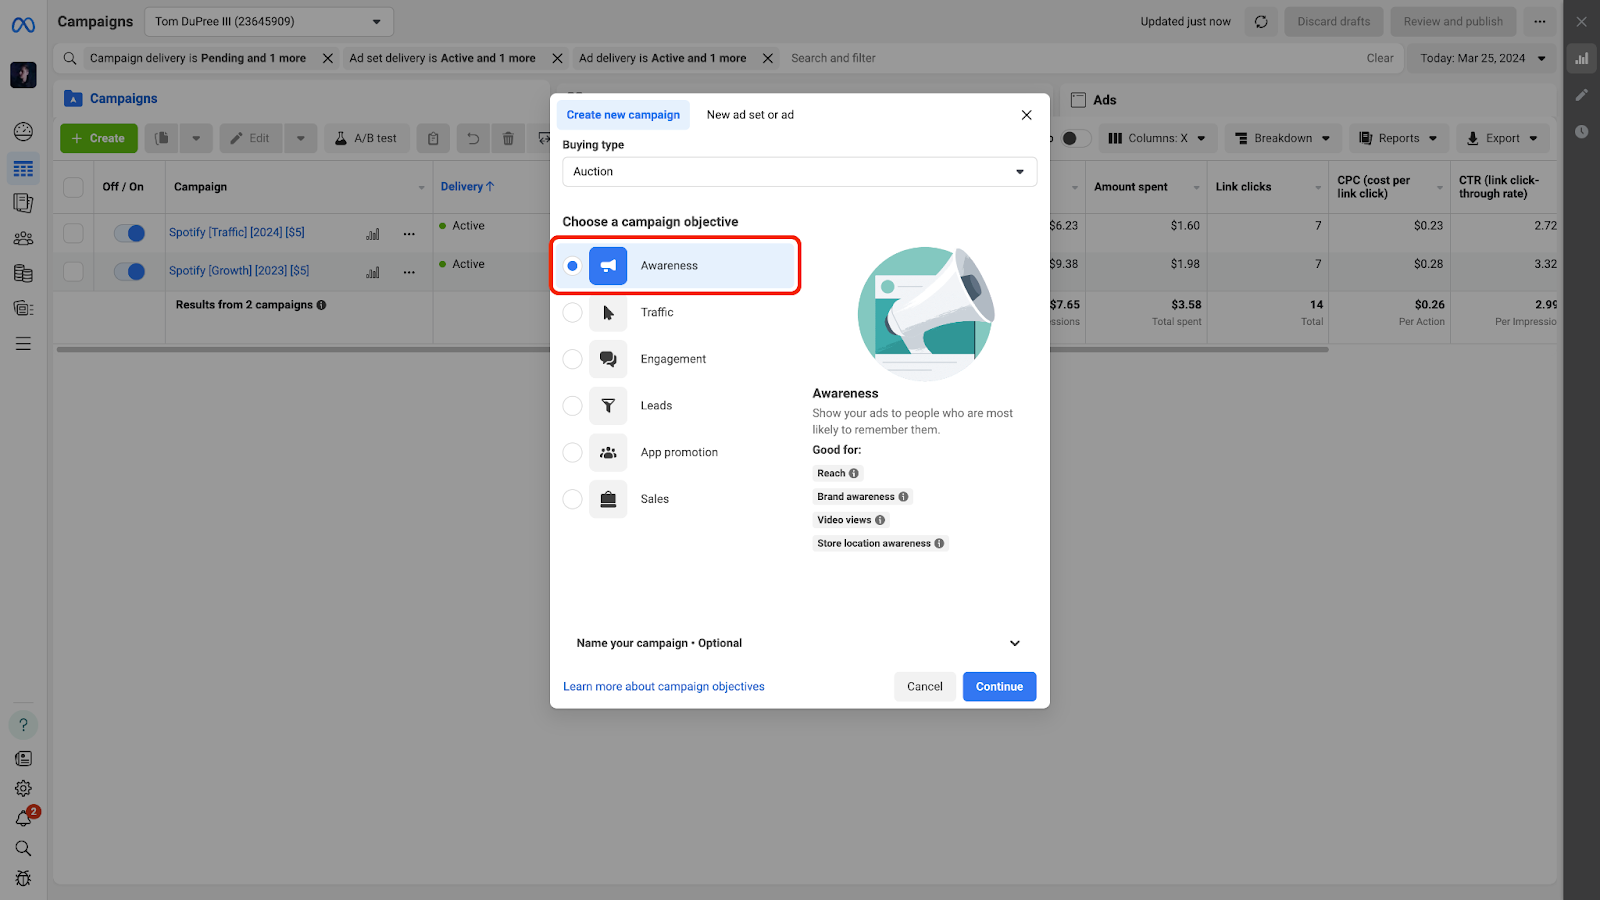
A huge thanks to all of you who replied to last week’s email (or commented on last week’s video) to express interest in seeing a more detailed breakdown of how to grow on Instagram with ads. Because so many of you seem keen to dig into this topic a bit more, we’re going to spend the next few weeks dissecting each step in the process. This week, we’re starting at the top and unpacking how we can generate more awareness for our existing organic content on Instagram reels, specifically. Let’s jump into it. Starting a campaignOur primary objective with this initial campaign is to let people know we exist, nothing more. So right out of the gate, when creating a new campaign, we want to select the “Awareness” objective.
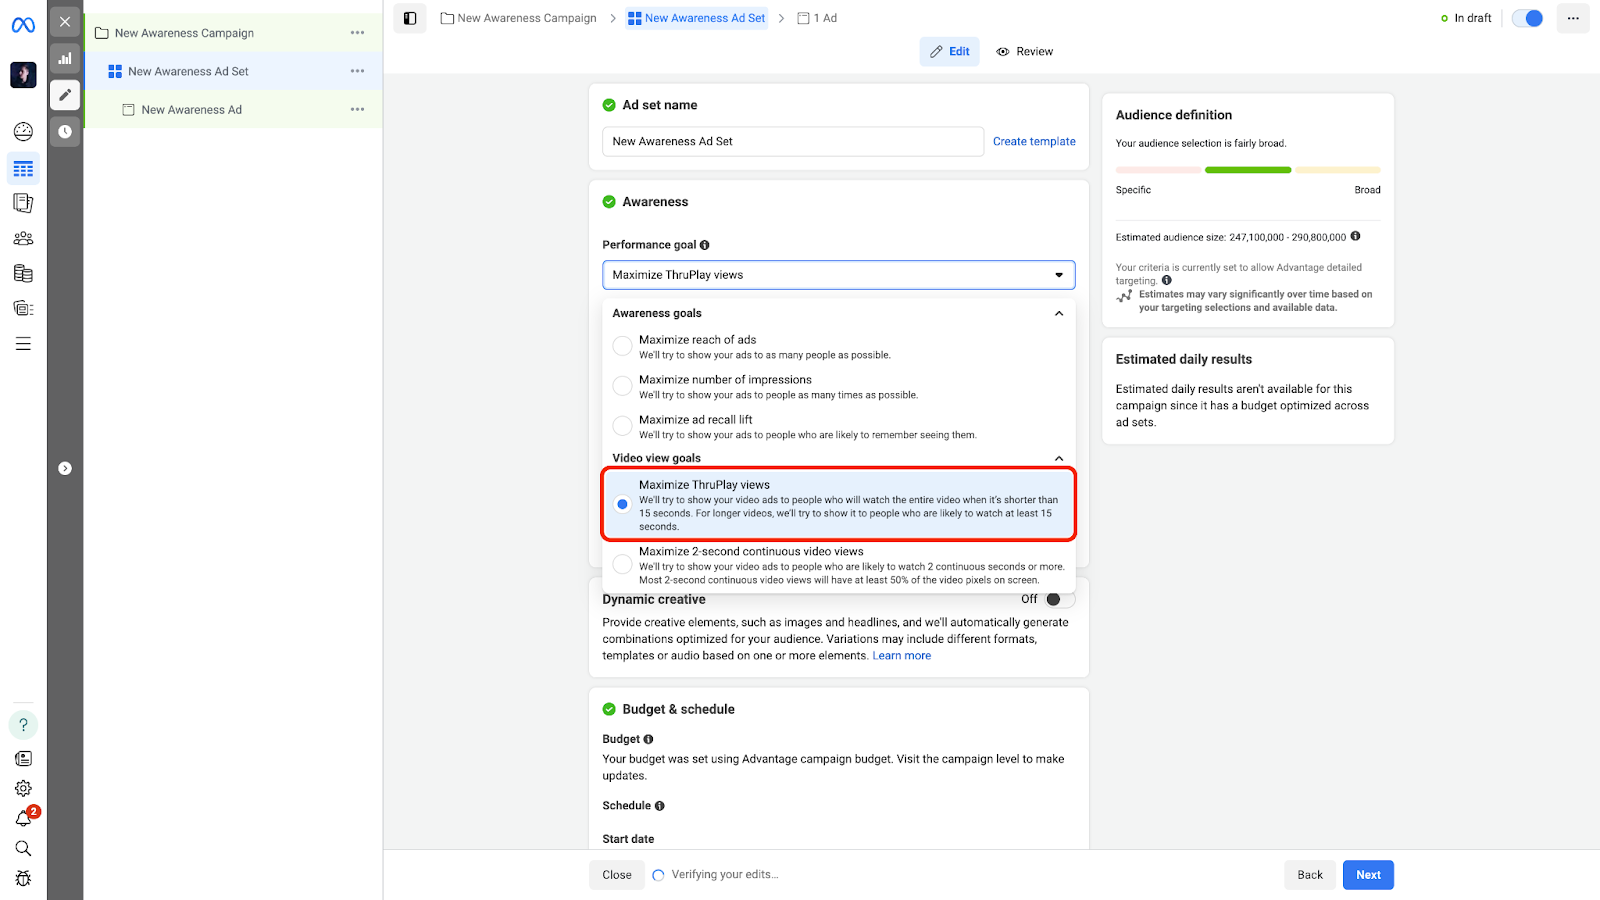
As you can see, we have several options here, but we’re going to be shooting for video views (more on that at the ad set level). Once we’ve selected our objective, we’ll name our campaign and set our budget. As a side note, I like to keep Advantage Campaign Budget on whenever possible. It just makes life easier. Targeting & placementsThe ad set level is where the bulk of the work happens in any campaign, and this one is no different. Once we’ve named our ad set, the second thing we’ll do is select our objective. There are several options we can choose from here, but my favorite objective is to maximize ThruPlay views.
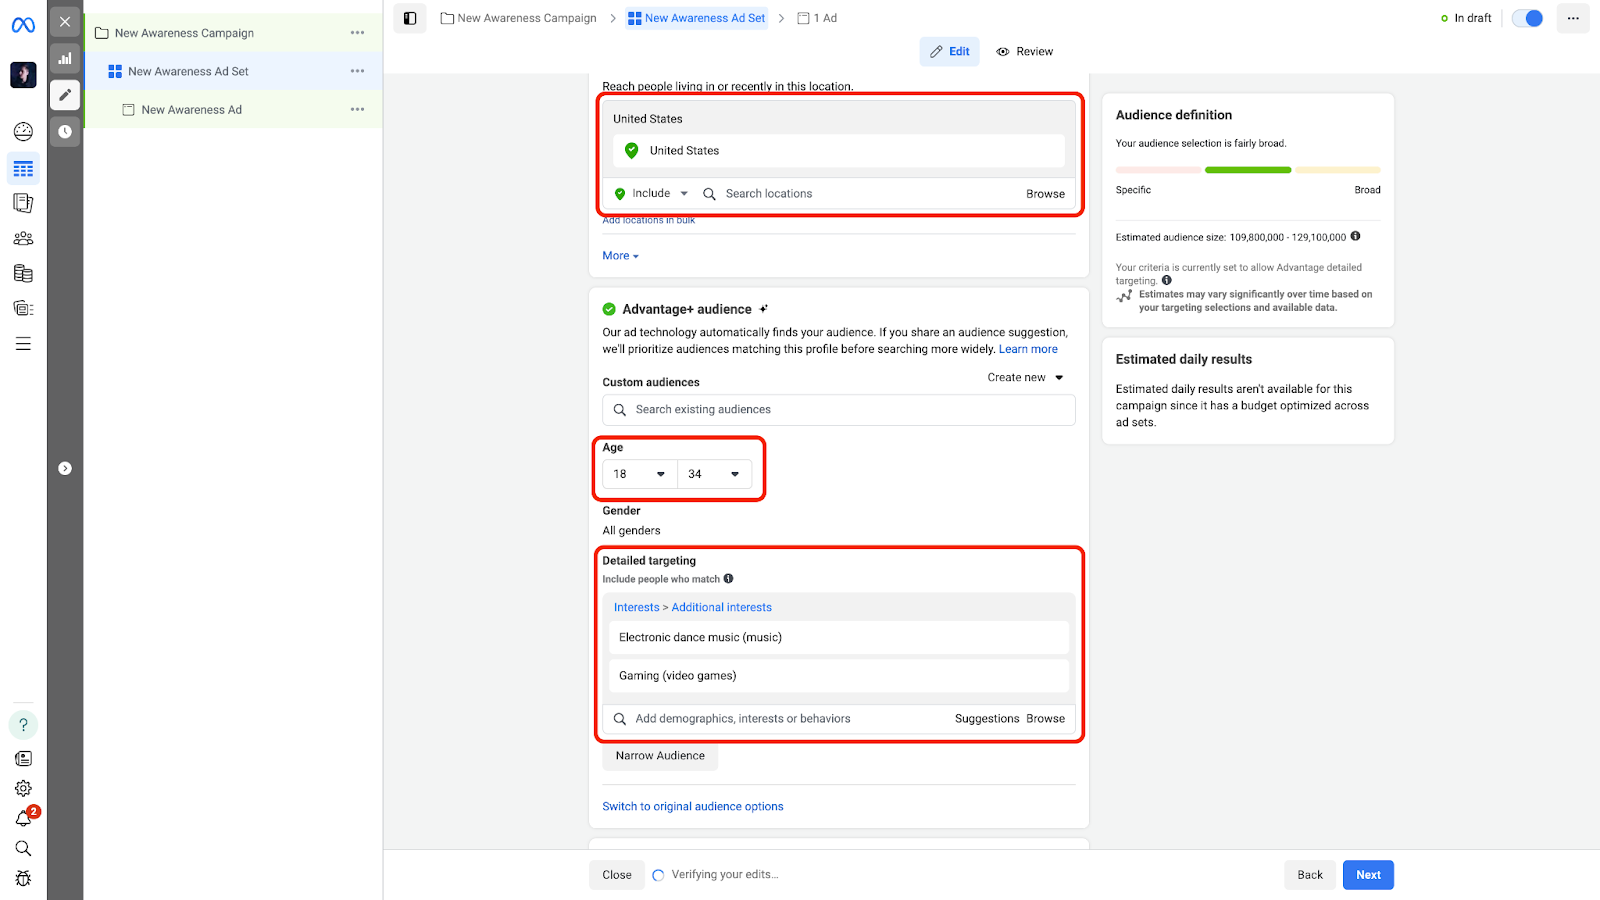
This will help us generate awareness while simultaneously building in some fun (and hopefully lucrative) engagement metrics on our content. For most videos posted to Instagram reels, this is going to show the ad to people who are most likely to watch the entire thing. Perfect. Once we’ve set our objective, it’s time to dial in our targeting. Now, it’s easy to want to throw the net far and wide here, but my advice is to stick to a handful of countries where you truly want to build a core audience. Maybe even just one country. Ultimately, getting video views and engagement is about building our audience in a thoughtful way, not just trying to generate feel-good metrics. I generally like to target the United States only. If I add additional countries, I’ll look at Canada, the UK, and Australia. Of course, it all depends on where you’re from and where you want to grow, so choose what’s best for you. From there, we can dial in our age and narrow in our targeting based on audiences with similar affinities and interests like other bands and artists, musical genres, or even tastes outside of that like hobbies and passions (e.g. gaming, photography, video equipment, etc.) Again, it all depends on who you want to reach. For me, I know there’s an overlap between gaming and electronic music for my audience, so that’s who I’m going to target here.
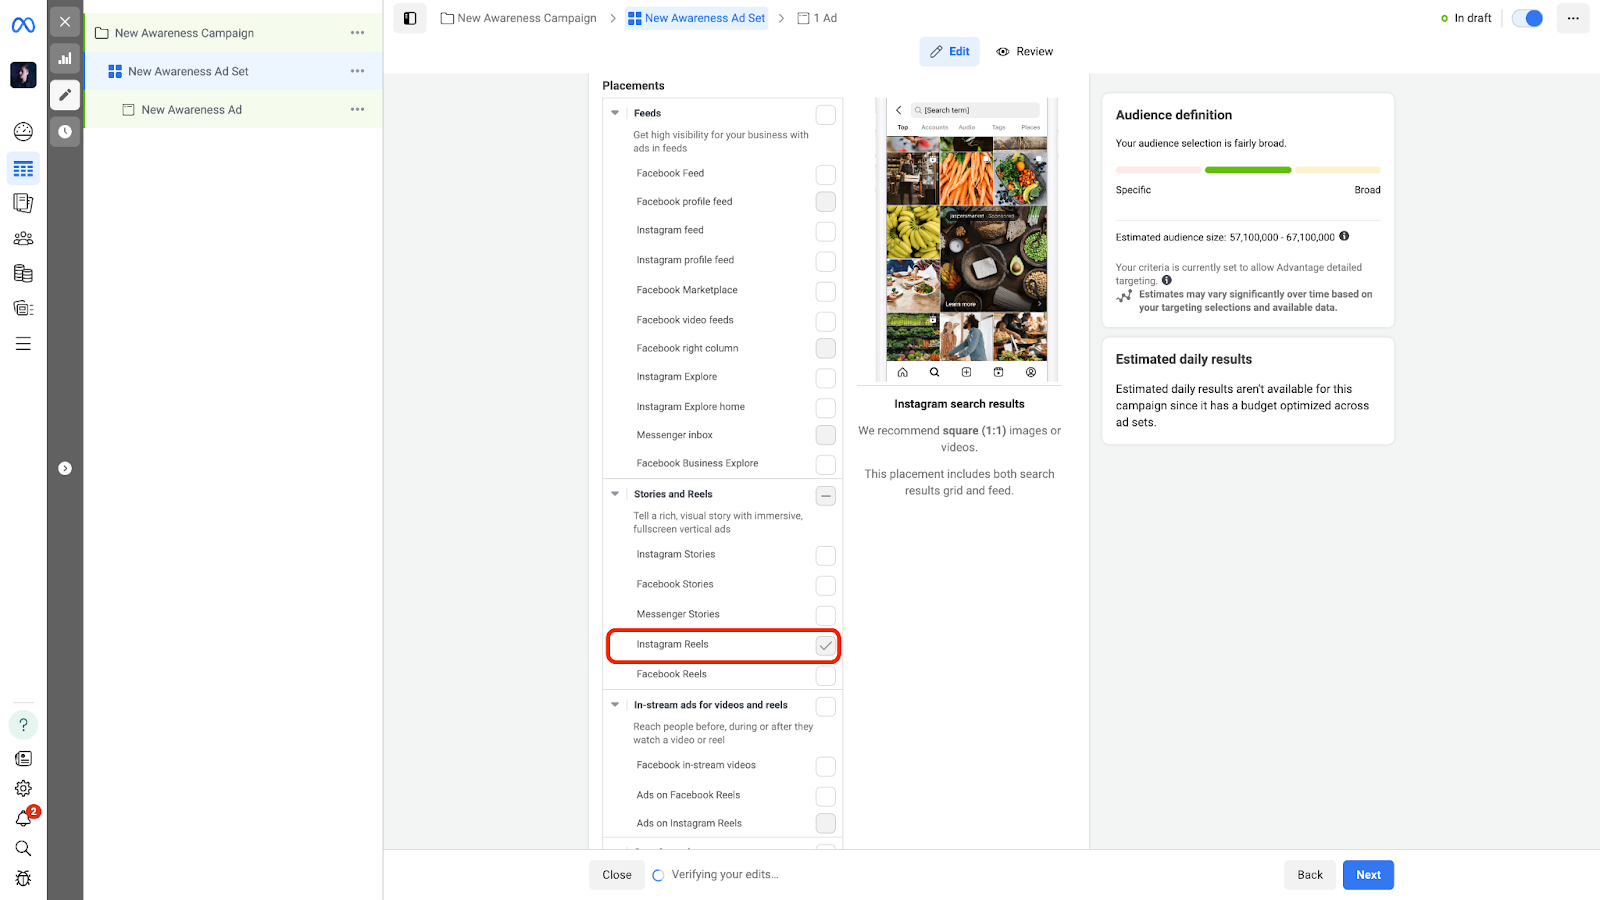
If you want, you can narrow for Spotify at this stage, but only if it’s in service of your end goals. If you’re trying to build an audience on Instagram so you can sell sample packs, for example, Spotify may not be a necessary addition here. Whatever targeting options you choose, the most important thing at this level is to keep it broad. We’re looking to give the ad platform a bit of direction about where to show our ads, not dictate it specifically. After all, we want to leverage the power of the platform to find new people—it knows more about how people behave on Instagram than we do. For the last step inside our ad set, we need to select where our ads will be shown. The ideal version here is that we’ll be pushing an existing Instagram reel as the content for our ad, so I recommend deselecting every other placement but that one.
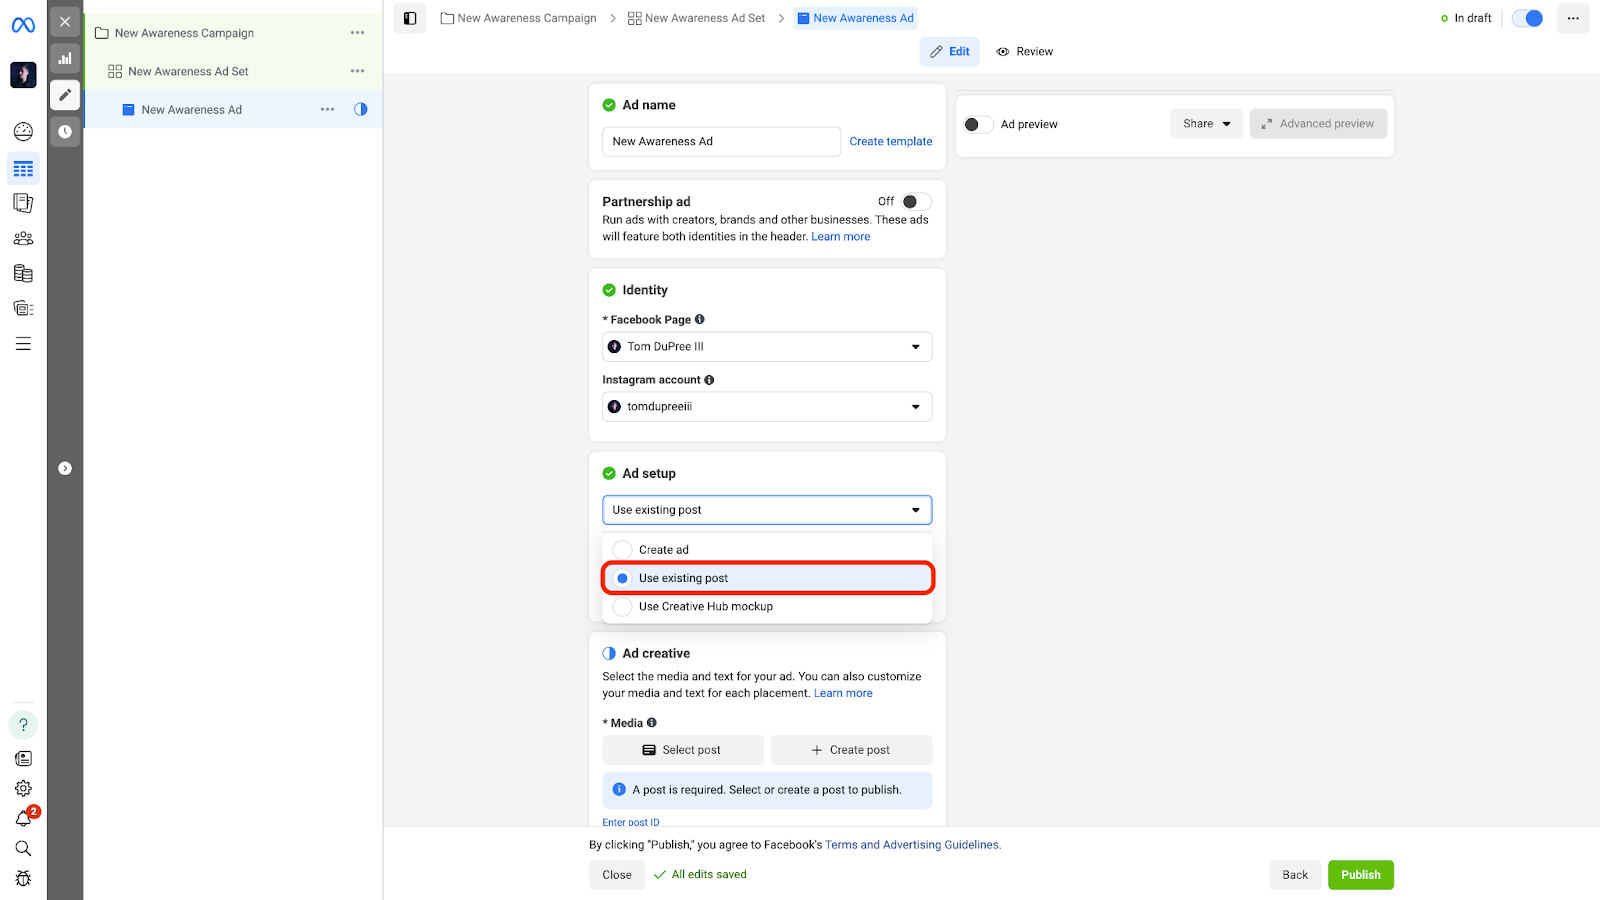
Once that’s done, we’ll move to the ad level. Creating the adOnce we’ve named our ad, the first big step we’re going to take is to select “Use existing post” from the drop-down under “Ad setup”. You can always upload a new video if you want to, and if you do, most of these steps will be the same.
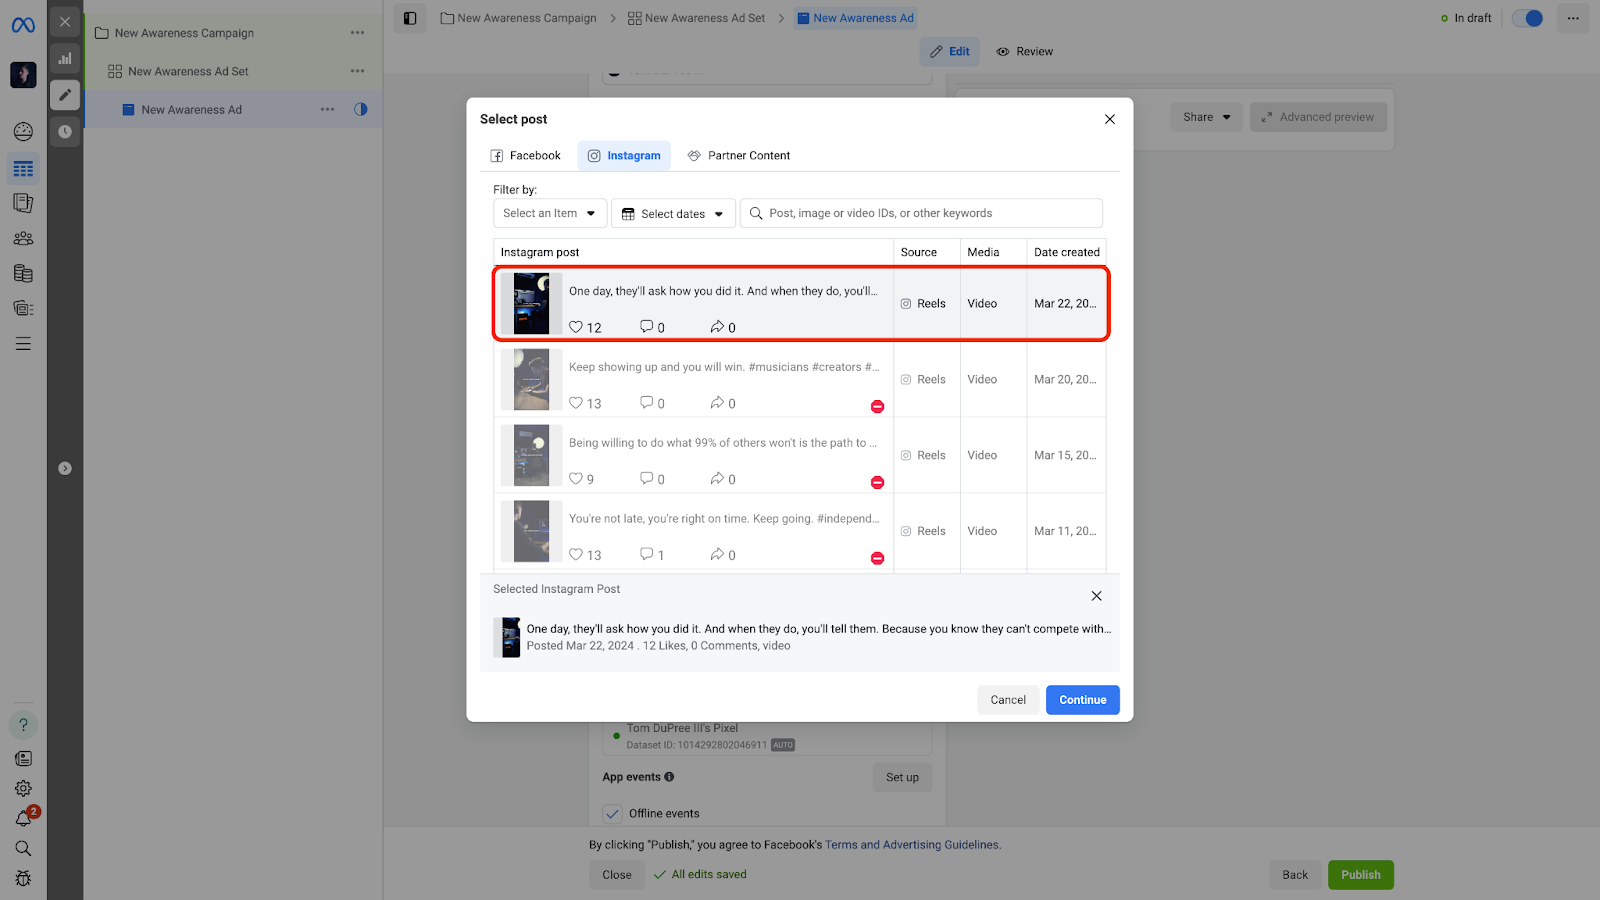
After that, we’ll select the post we want to use.
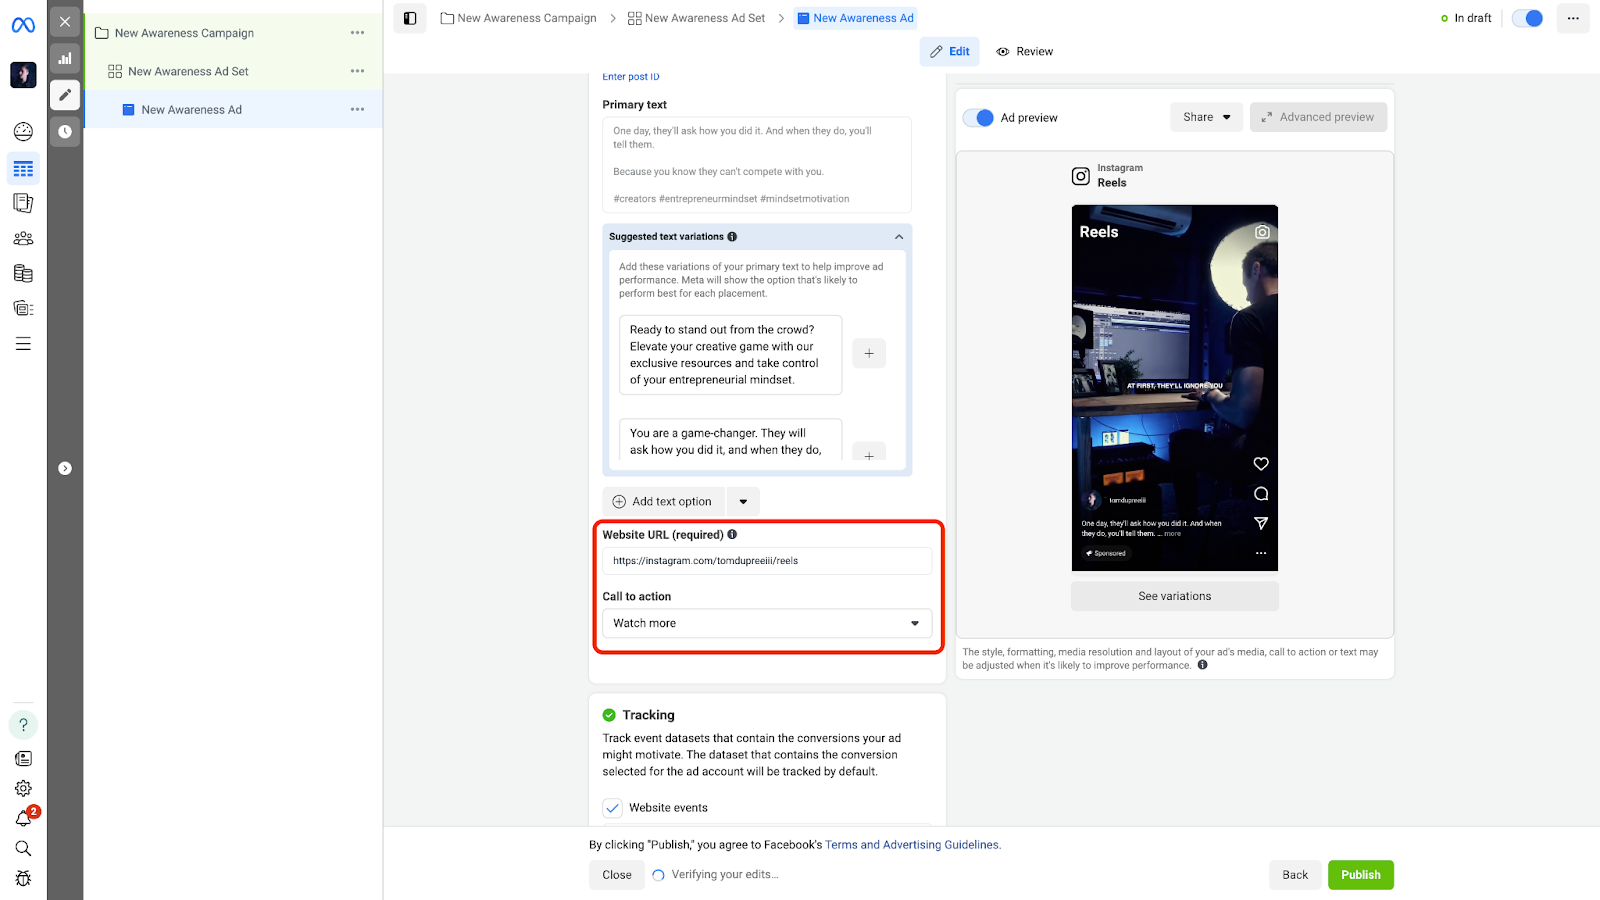
Make sure you plan to use a post without a copyright warning on it. If you see that little red octagon, the post is unavailable for use as an ad, so you’ll need to pick something else. In some cases though, you should be able to select a post with your own music in it, which is preferred, especially if your end goal is to grow as an artist on Spotify. Once your post is selected, it’s time to add more text options (optional: only do this if you want to), drop in your link, and select a call to action.
Because we’re optimizing for video views here, a call to action isn’t necessarily required (you probably won’t get a ton of click-throughs anyway), but if you do want to include one, my two favorite combos are sending users to the reels tab on my profile (pictured) with the “Watch more” CTA or sending users to my Spotify artist profile with the “Listen now” CTA. Again, it all depends on your objectives. Once you’ve reviewed the setup for your campaign, ad set, and ad(s)—always a good idea—you can hit publish, sit back, and watch the views roll in. If you want to dig a little deeper into this topic, I’ll be covering it in more depth on YouTube this Thursday. Hope to see you there.
|
The One Thing
One high-leverage idea to scale your audience (and your business). Delivered every Tuesday.
Many independent artists mistakenly believe they have to be great at a thousand things to succeed, but it’s really only three. Yes, it feels like you have to master everything from video editing to writing, to networking, and on and on, but that’s simply not the case. Most of the opportunities you’re looking for can be found downstream of nailing only a handful of high-value tasks that matter most. I believe that if you can master these three skills, the rest of what you might feel compelled...
Now is the time to start planning how you’ll release and promote music in 2025 so you can hit the ground running in the new year. Every January, YouTube comes alive with videos about “how to get your first 1 million streams (or something similar) in 20XX”, but for me, the work begins long before the beginning of the year. No doubt, December is all about the holidays, but it is also a time that is best suited to create a plan and start putting in the work to achieve your goals. Here are four...
We all love winning the game of attention, but revenue is the true lifeblood of any business. Views, likes, streams, and followers are important metrics—social proof matters—but too many creative people get stuck at this stage without considering how to monetize their efforts. Yes, you can make a little money from streams on Spotify and ads on YouTube, but if you want to convert your passion into purpose and your purpose into profit, you’re gonna have to sell something. This means creating a...