One high-leverage idea to scale your audience (and your business). Delivered every Tuesday.
6 custom audiences to supercharge your ads
|
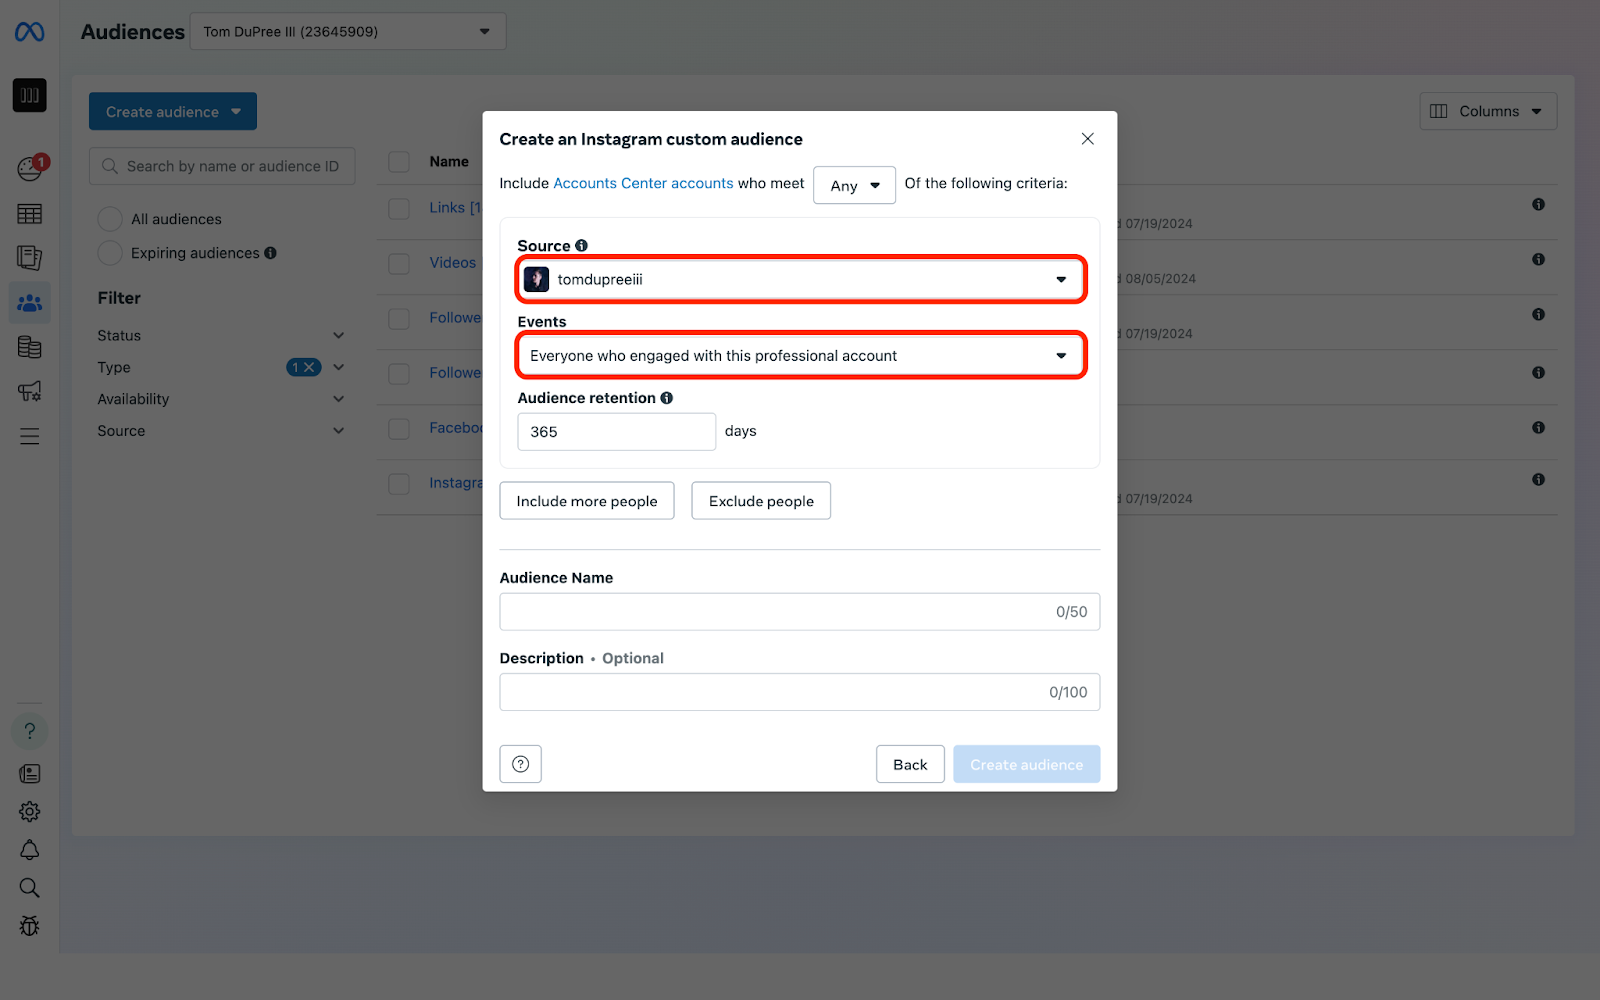
Creating your own audiences is the surest way to take your Meta advertising to the next level. Sure, cold targeting in the form of similar artists, genres, and affinities can certainly be effective, but nothing works better than targeting people specific to you. Every artist is different, every song is different, and every audience is always just a little bit different too. And those differences can be powerful. Now there are a lot of options involved when it comes to creating your audiences of your own—suffice it to say, it can be a bit of a rabbit hole—but it all starts with the custom audience. So let’s get you on the right path by detailing the setup behind six of my favorite custom audiences on Meta’s ad platform. Instagram engagementIf there were one audience to rule them all, in my mind, this would be it. In almost every ad campaign, in every ad account—and in every genre of music—the bulk of the results come from placements on Instagram. And all the engagement from those ads goes right into this audience. An engagement audience is the best way to capture as much information as possible for your campaigns without going too far down the rabbit hole of audience creation, so if you’re overwhelmed by the prospect of creating all of the audiences on this list in one sitting, then start with this one and add the rest later. To create this audience, we’ll start in the “Audiences” section of Facebook’s ads manager. Click the blue “Create audience” button, select “Custom audience”, then select “Instagram audience” as your source.
From there, the system should automatically populate your Instagram account, and the “Events” dropdown should show “Everyone who engaged with this professional account”.
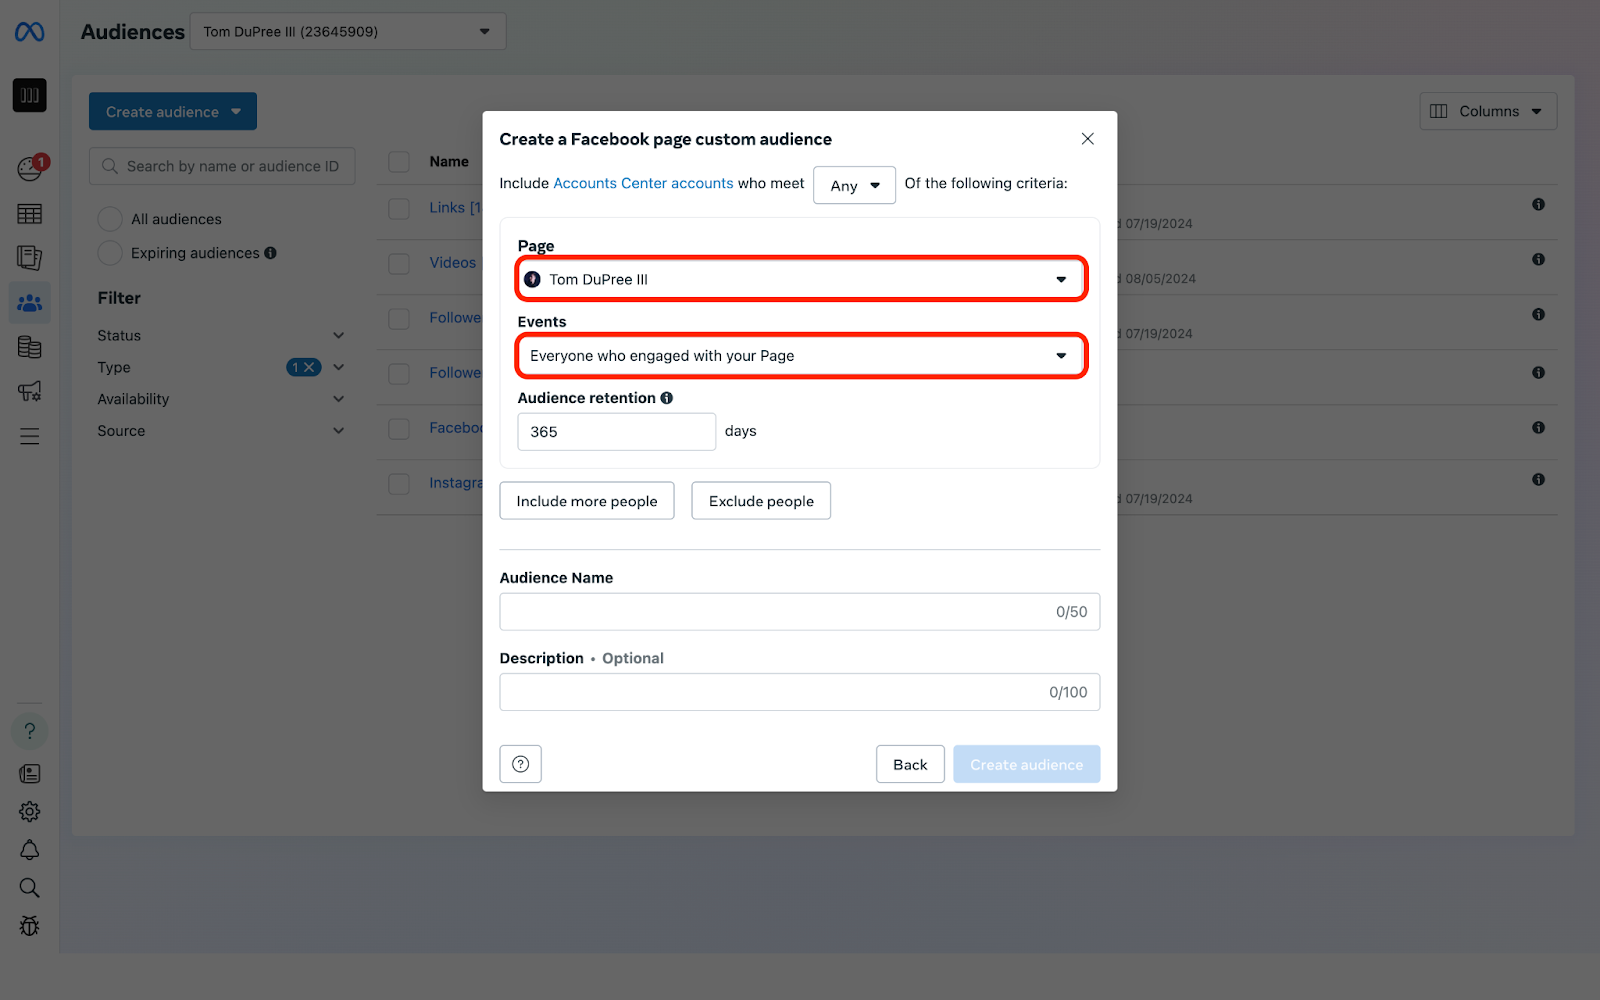
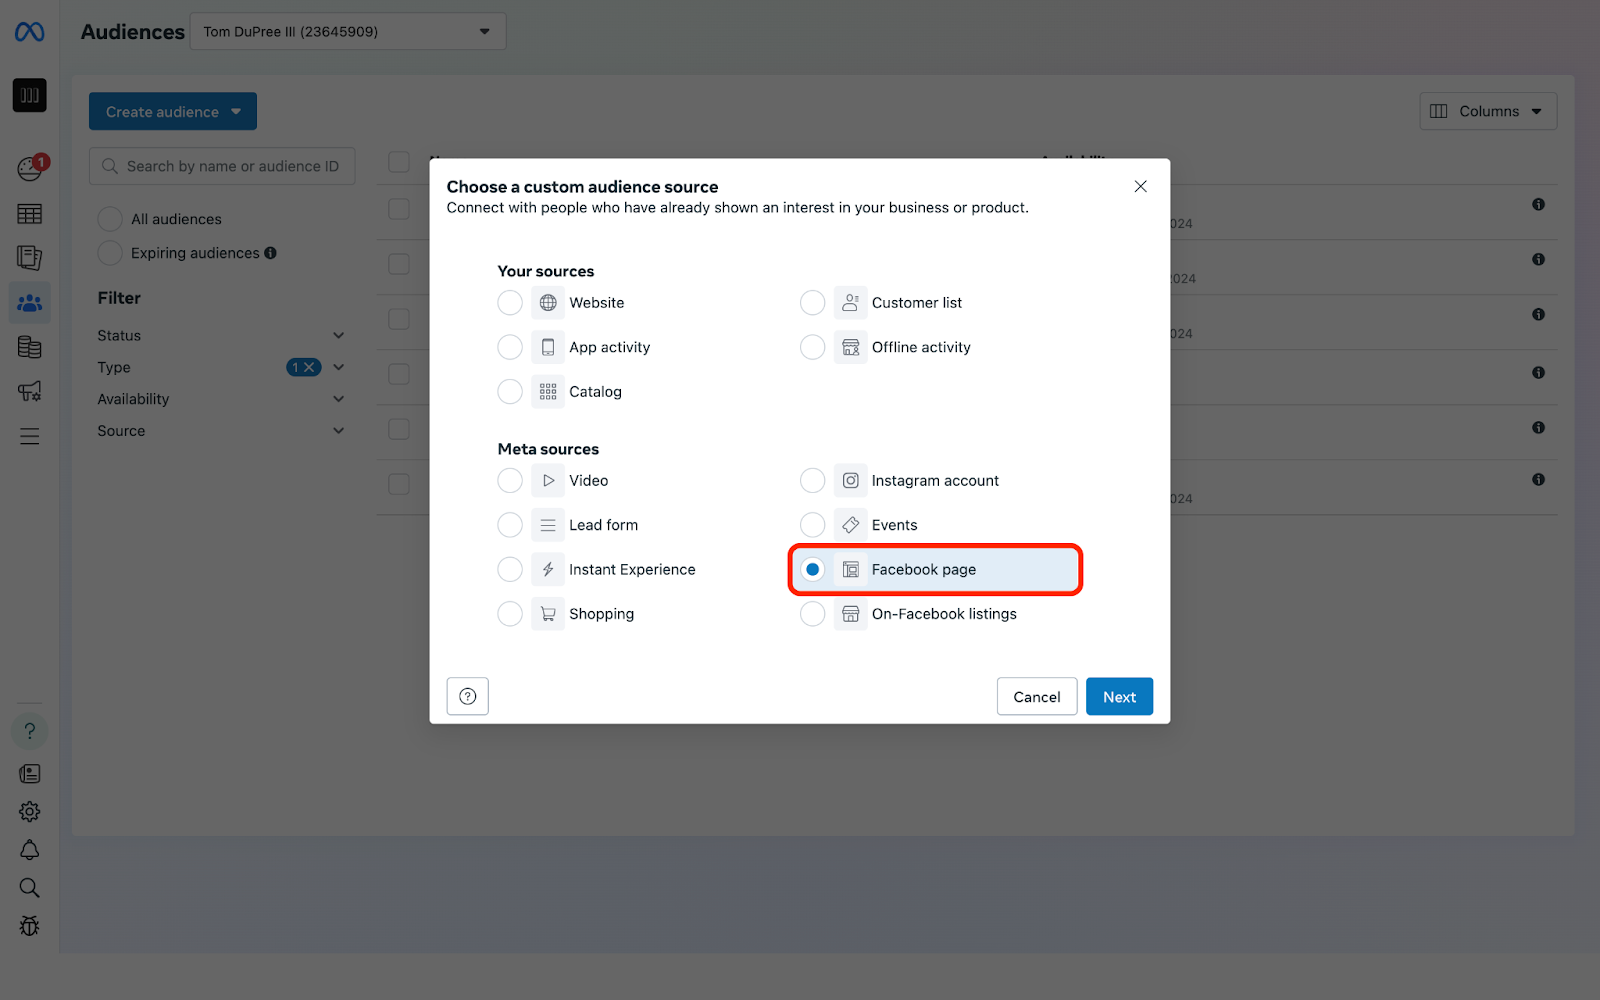
Keep the retention set to 365 days and give it a name like “Instagram [365]” so you have a quick heads-up display for what’s in it, then click “Create audience”. Note: for every audience on this list, we’re going to keep our retention period open as wide as possible to give Meta as many options to choose from as we can. This allows us to leverage the platform’s user data to our benefit. Facebook engagementMuch like our Instagram engagement audience, a Facebook engagement audience throws a wide net and is the best way to capture as much information about your fans as possible without breaking the bank in terms of time spent creating audiences. If you’re seeing a decent amount of traffic for your campaigns coming from Facebook placements, then this is one you’ll definitely want to consider. To create this audience, click the blue “Create audience” button, select “Custom audience”, then select “Facebook page” as your source.
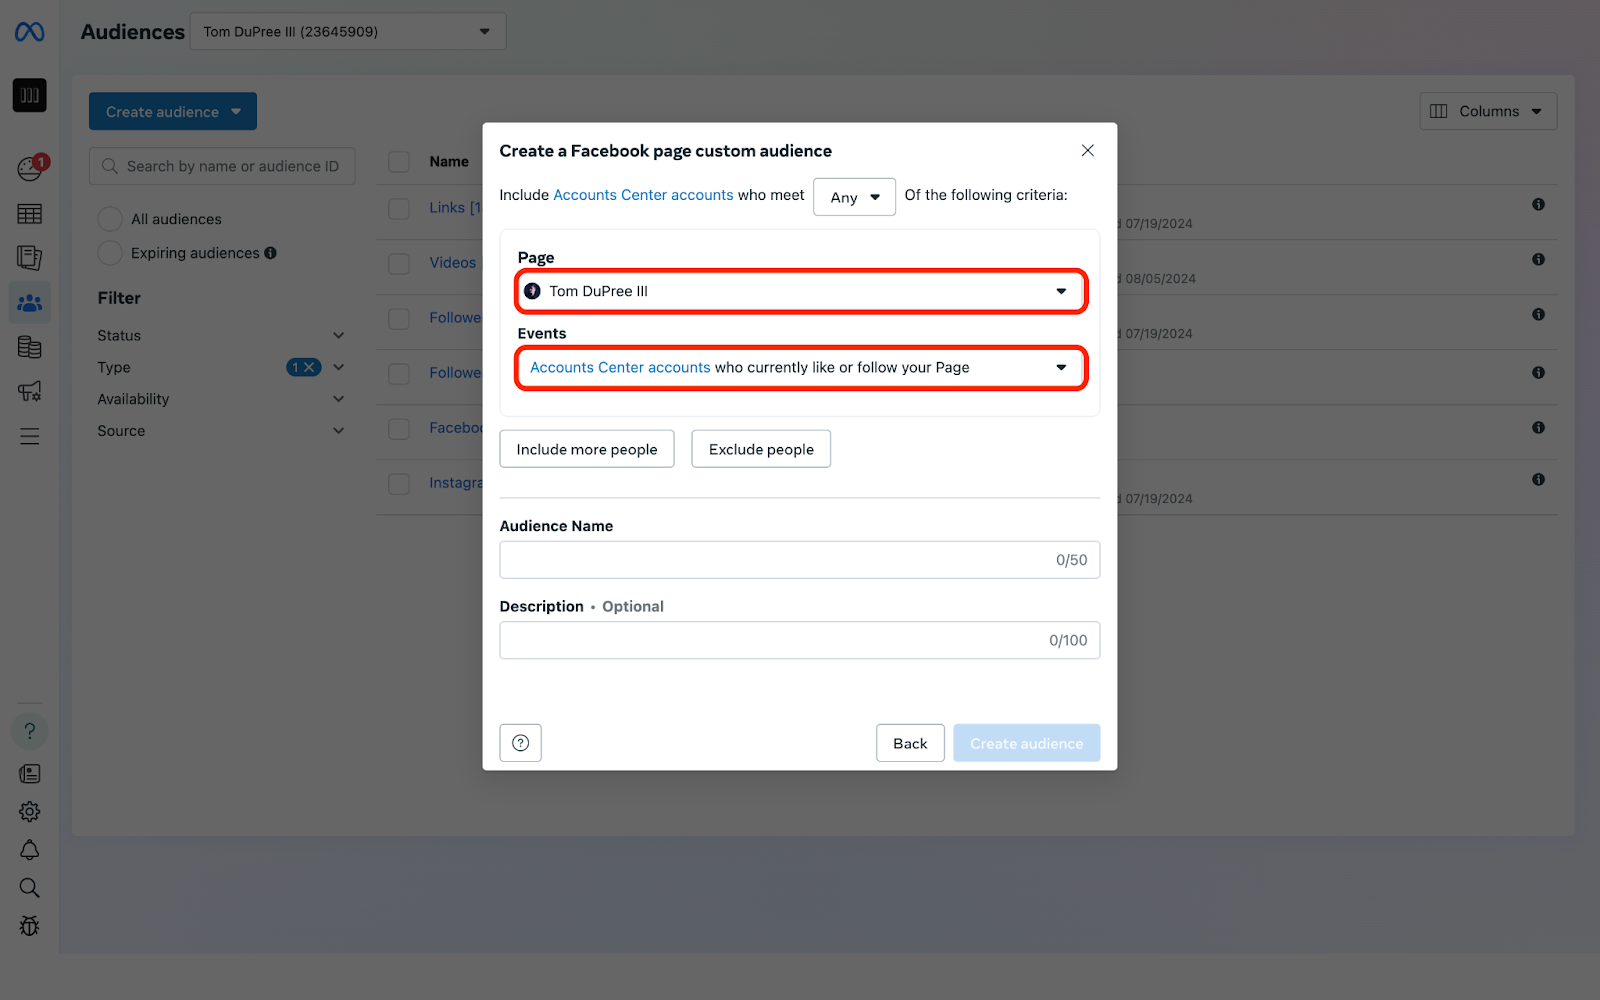
From there, the system should automatically populate your page, and the “Events” dropdown should show “Everyone who engaged with your Page”.
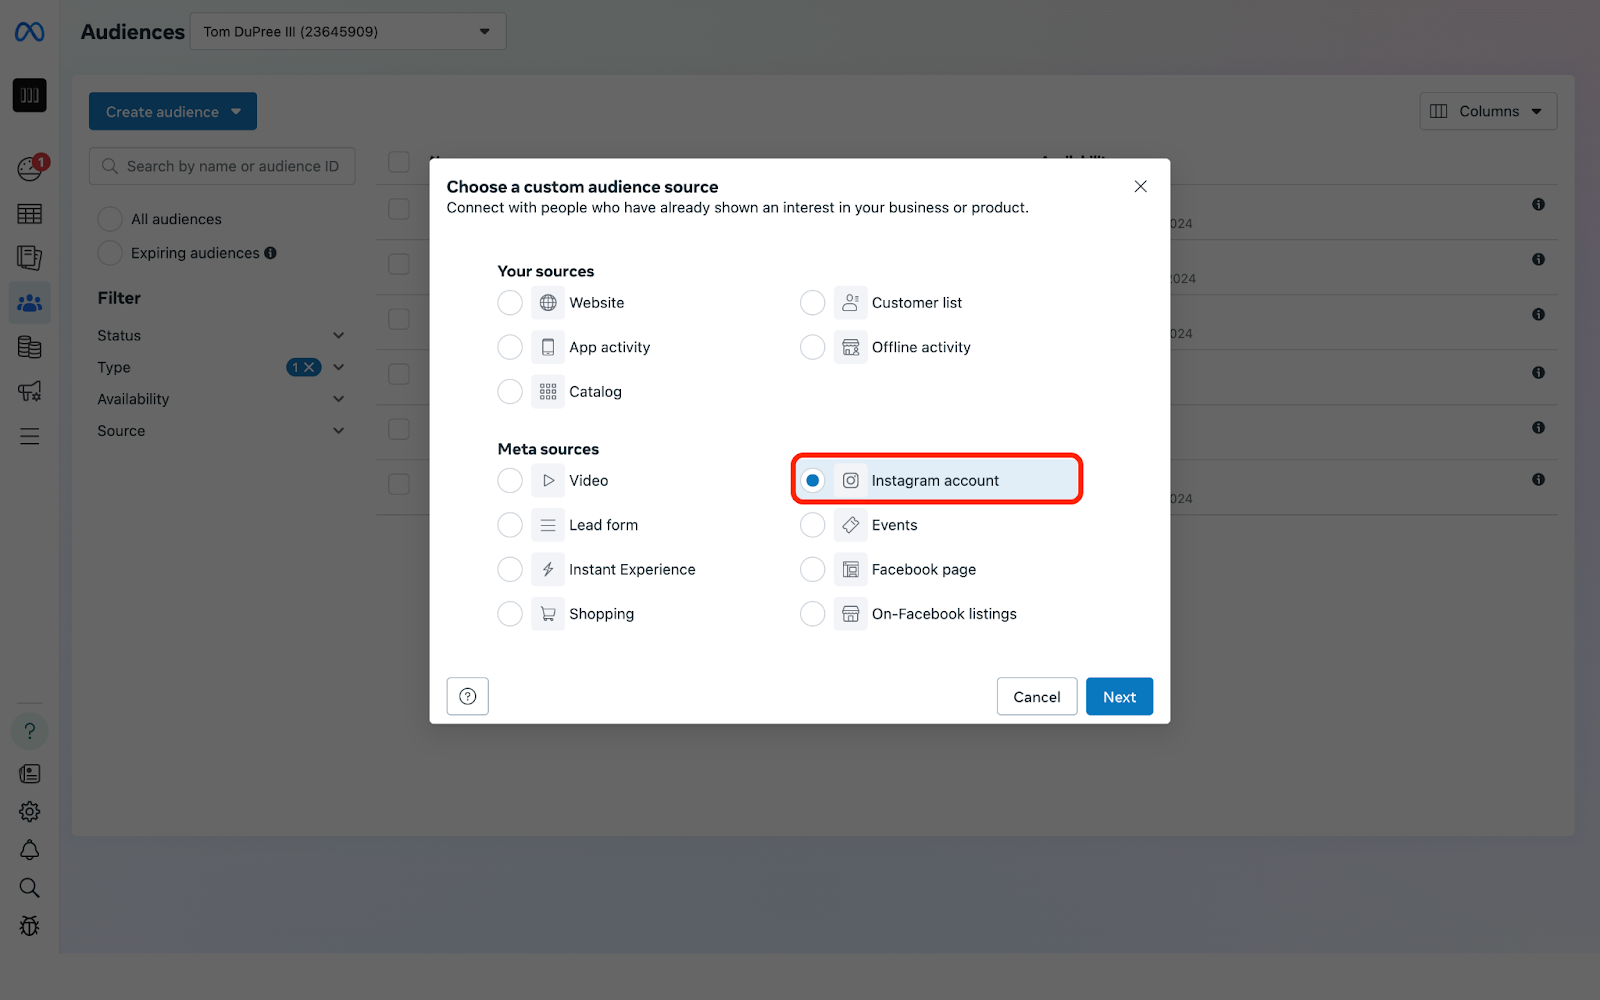
Again, keep the retention set to 365 days and give it a name like “Facebook [365]” for a quick heads-up display, then click “Create audience”. Instagram followersSometimes you want to go a little bit tighter than just those people who have engaged with your content. Maybe you want to target only those people who have followed you, or, maybe, you might need to exclude your followers from your targeting if you’re running a campaign with an objective like trying to gain new followers, for example. Doesn’t make a lot of sense to run ads for new followers to your existing followers, right? To create this audience, click the blue “Create audience” button, select “Custom audience”, then select “Instagram account” as your source.
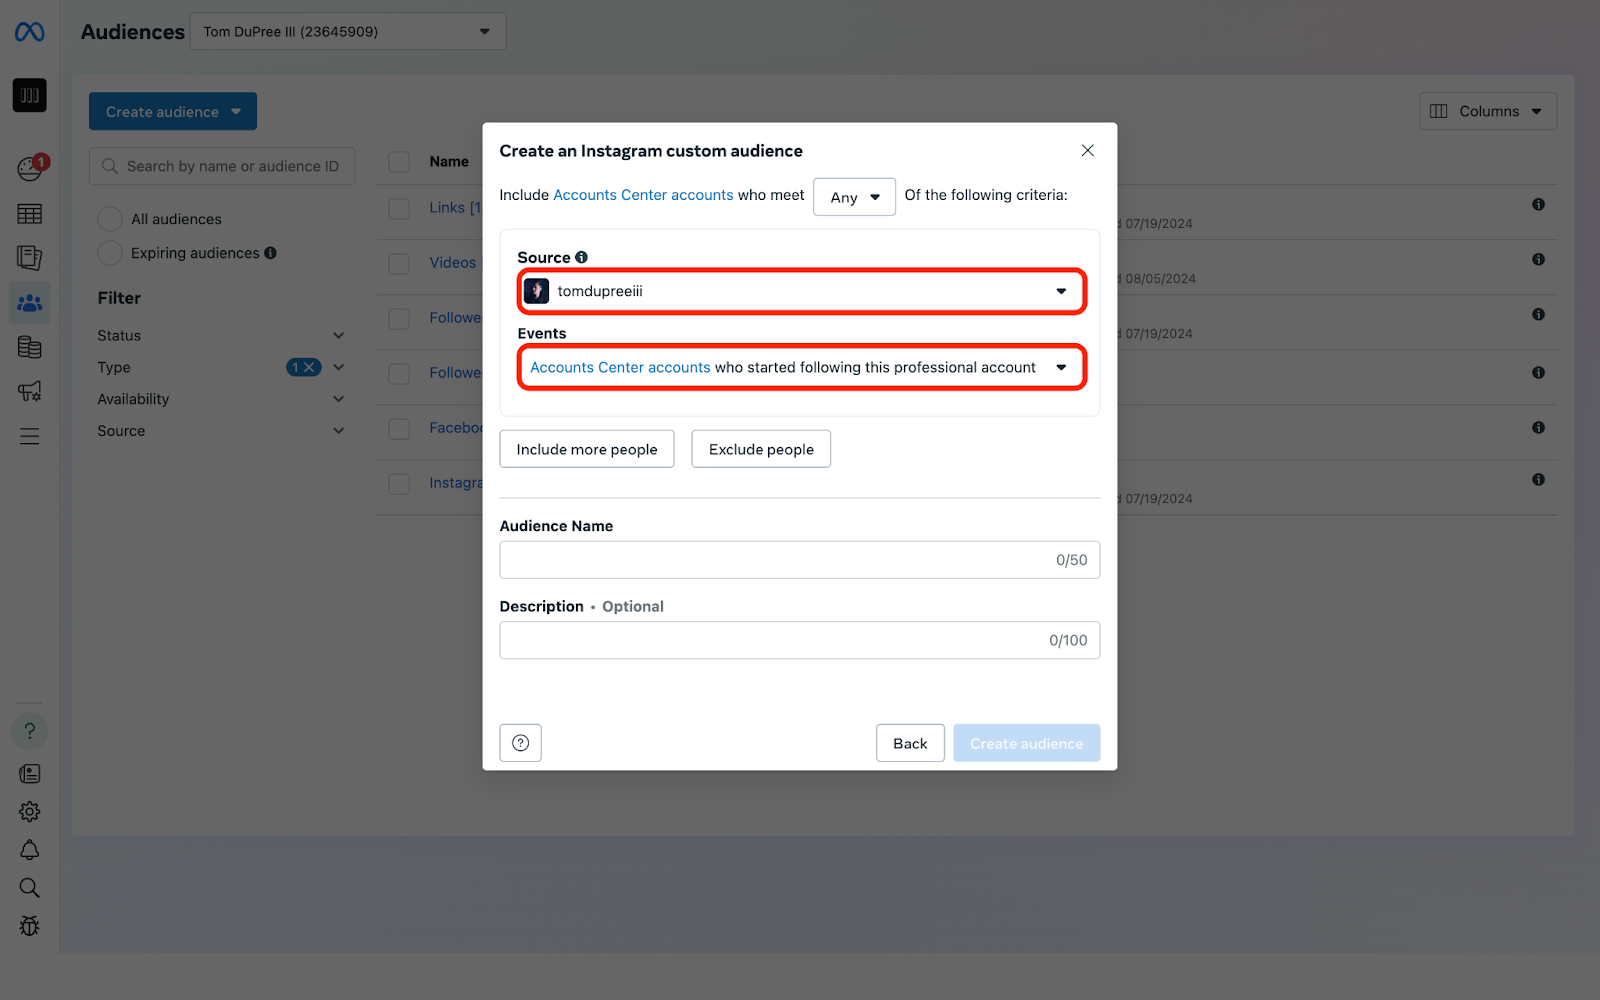
Once again, the system should automatically populate your Instagram account, and the “Events” dropdown should show “Everyone who engaged with this professional account”. But we’re going to change this second dropdown to “Accounts Center accounts who started following this professional account”.
You’ll note the retention field has disappeared (no timeline on following), so give it a name like “Followers [IG]”, click “Create audience”, and you’re all set. Facebook followersJust like with Instagram, sometimes it makes sense to capture everyone who is following your page on Facebook. And honestly, for the same reasons. Once again, click the blue “Create audience” button, select “Custom audience”, then select “Facebook page” as your source.
Again, the system should automatically populate your page, and the “Events” dropdown should show “Everyone who engaged with your Page”. Just as we did with Instagram, we’re going to change this second dropdown, but this time we’ll select “Accounts Center accounts who currently like or follow your Page”.
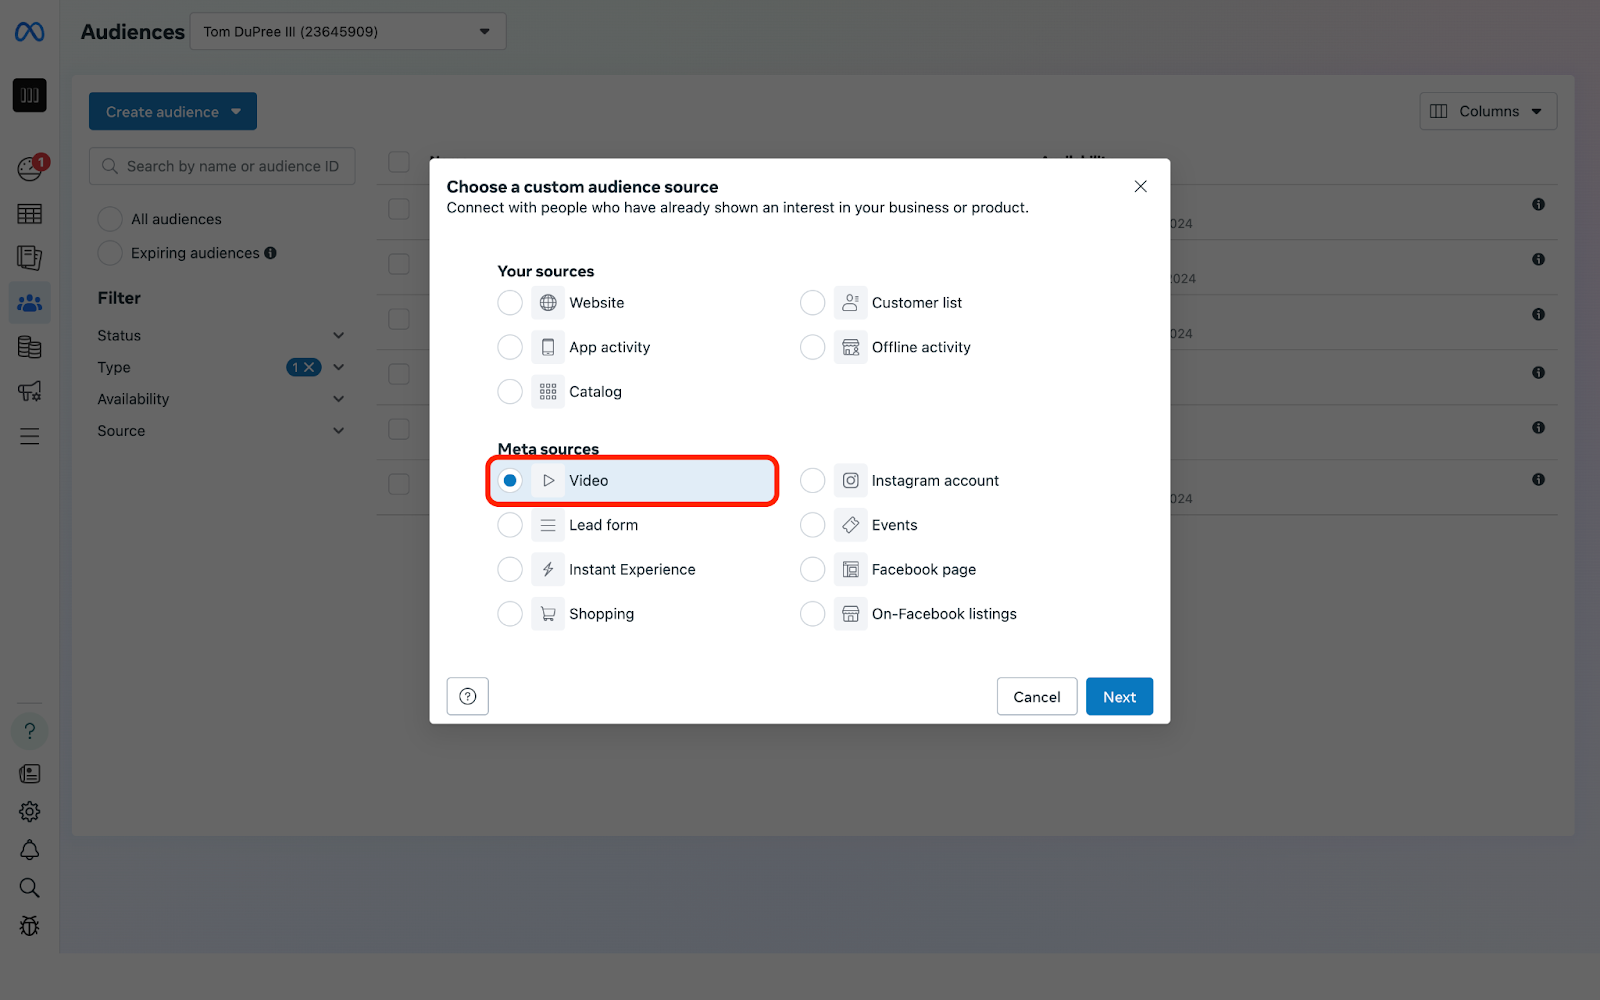
Again, you’ll note that the retention field has disappeared, so simply give it a name like “Followers [FB]” and finish by clicking “Create audience”. Video engagementNow it’s time to switch it up. Our first four audiences are simple ways to create buckets that automatically update over time without any action taken beyond the initial setup. But sometimes, we might want to collect people who have engaged with specific ads or pieces of content. Things like retargeting for lead generation or sales are both good reasons to do this. This strategy also makes a lot of sense if you’re running ads for multiple verticals inside one account (e.g. promoting music, promoting a service, selling sample packs, etc.). To create this audience, you’ll once again click the blue “Create audience” button, select “Custom audience”, then select “Video” as your source.
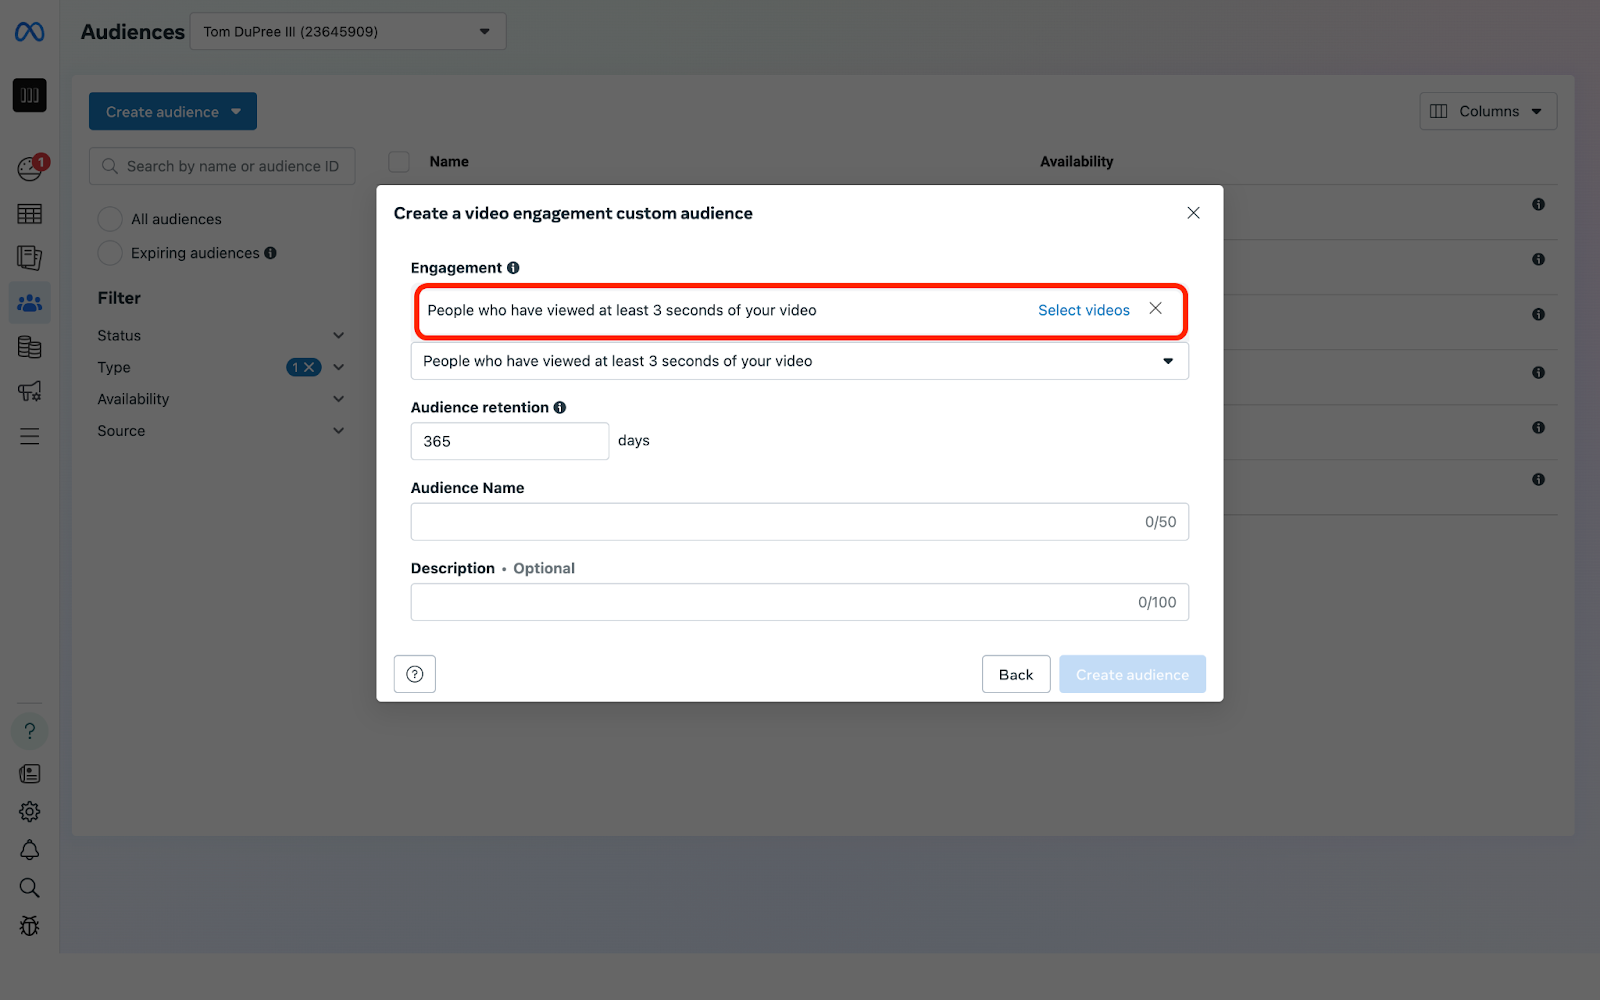
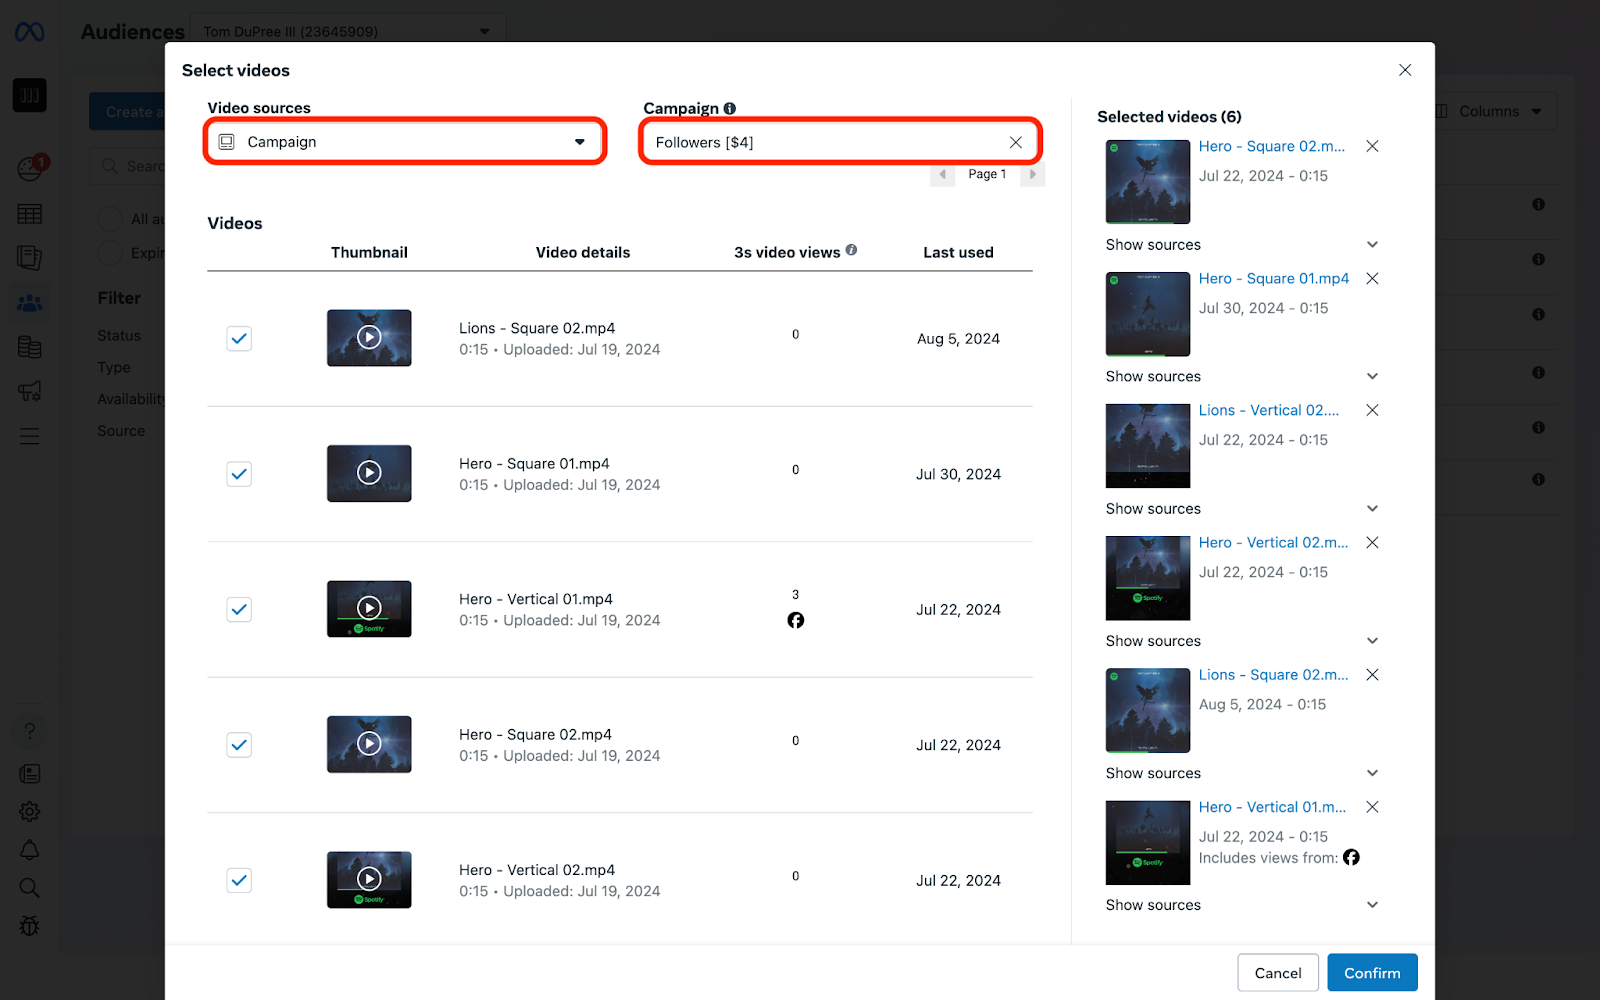
Now, under the “Engagement” dropdown, we have a different set of options—we can select from a variety of view durations to capture attention. My favorite choice here is “People who have viewed at least 3 seconds of your video”. I’ve tested other options here over the years, but as I’ve learned more about how Meta’s audience targeting works, I’ve come to understand that, just as with the retention period, going wider is better. See, Meta knows how long every single person viewed every single video you’re going to drop into this list, and anyone who has watched for one of the longer durations like 10 or 15 seconds has, by default, viewed for at least three seconds. If we include everyone who has watched for three seconds, Meta is going to start by targeting the people who have viewed for the longest duration and work backward from there, so we’re not really doing ourselves any favors by excluding anyone. We might as well grab as many people as we can and let Meta do the work for us. So we’re going to select that first option. Once we do, we’ll need to click the blue “Select videos” link and include as many videos as we want.
I like to do this by selecting “Campaign” under the “Video sources” dropdown and then adding my videos by campaign from the “Campaign” field to the right of that.
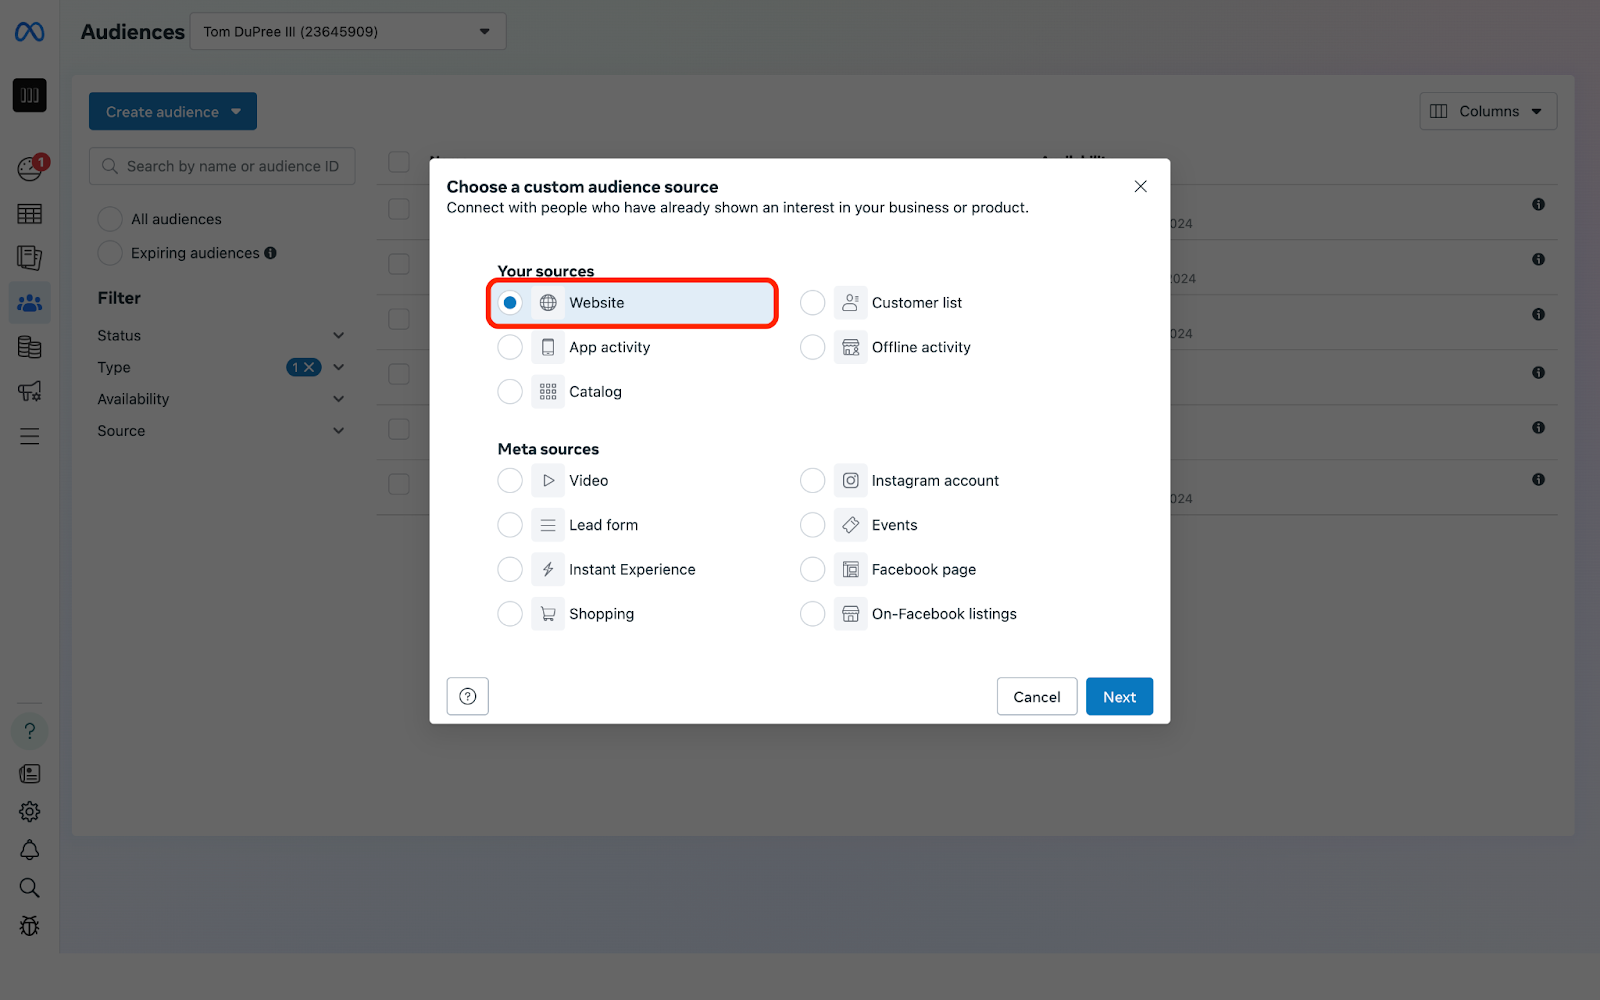
If you’re looking to go wide, select as many videos as you can. If you’re looking to retarget for a funnel-specific objective, select only the videos that make sense. Once you’ve selected all the videos you need, click “Confirm” to return to the previous screen. From there, we’ll keep the retention as wide as we can at 365 days again, give the audience a name—something like “Videos [365]”—then click “Create audience” to finish up. Note: as you add new videos to your campaigns, be sure to come back in and update this audience with that new content to ensure you’re always capturing the newest users over time. Website visitorsThis last audience is really only useful if you’re driving a lot of traffic to your website or a smart link using a conversion campaign. And though pixel-based audiences are not quite as rich in data as platform-based audiences these days, this is still one to add to your toolbelt if you have the time for it. To create this audience, click the blue “Create audience” button, select “Custom audience”, then select “Website” as your source.
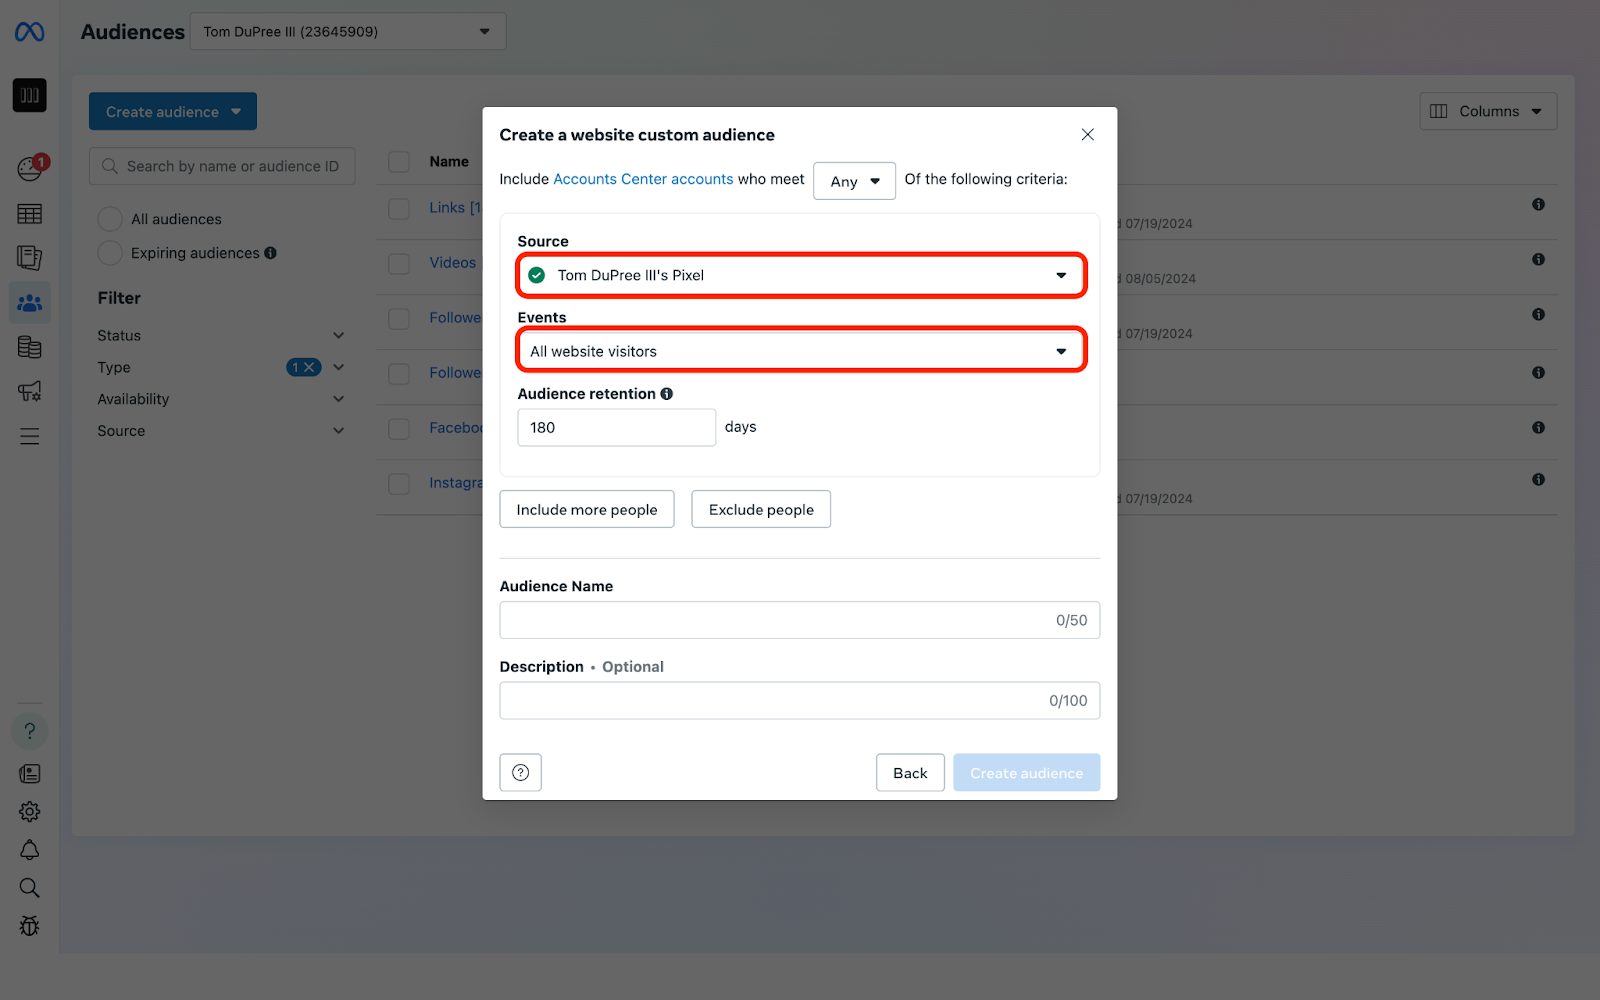
Make sure your pixel is selected under the “Source” dropdown, then leave the second dropdown set to “All website visitors”.
Adjust the retention period to 180 days (this is the longest we can go for pixel-based audiences), then give it a name like “Visitors [180]” and click “Create audience” to wrap it up. And just like that, you now have six unique audiences to use as targeting options in your campaigns or as seed audiences to create your very own lookalike audiences too. All of these will automatically remain up-to-date with fresh data over time, leaving you plenty of space to focus on creating music and promoting new material. Easy.
|


The One Thing
One high-leverage idea to scale your audience (and your business). Delivered every Tuesday.

Testing new ad creative is an effective way to maximize the efficacy of your Meta advertising campaigns. By continually introducing new creative options—photo, video, music, etc.—we can more readily find our “winners” and ensure they remain the best fit for our audience for an extended period of time. So let’s have a look at what it takes to run a creative split test, examine when and why we might do that, and dig through how we can best determine our winning ad(s) on the other side. When and...

Having multiple targeting options at your disposal is always a good thing, but sometimes you need to know which one works best. Enter: the split test. Just because one audience works in one context doesn’t mean a different one won’t be better in another. And in most ad campaigns, starting with more than one option is the best way to go about it. Fortunately, there’s a simple way to test multiple audiences at once, no matter the campaign type or your advertising goals on the other side of it....

The right targeting can make or break your ad campaigns to grow on Spotify, so it’s always good to have options. I am constantly tinkering with targeting options inside my own ad campaigns so we can take those winning combinations and apply them to campaigns for others with DuPree X. I also just like to have more than one setup I know I can depend on in the event the first option I try doesn’t work. So, after all of my testing, here are the four ad set targeting setups I lean into the most....